Coolant bleeding — removing air after repair
Quick FAQ
Why doesn't coolant circulate after cooling-system repair?
When is a vacuum coolant refill mandatory?
How do I bleed air from the cooling system on a Tesla Model 3/Y?
After which jobs is coolant bleeding required?
How many bleed cycles are needed?
Can I bleed coolant without Service Mode?
Description
After coolant system repair the coolant doesn't circulate — the fluid sits still when the procedure is started in Service Mode. The computer temperature climbs to 80-90°C. The cause is an air pocket.
Solution: two scenarios
The main rule (per the original Tesla manual): after removing and installing the HV battery the system may only be refilled with a vacuum created. Without vacuum, bleeding is acceptable only for a top-up or a minor repair — for example, when the radiator was removed for cleaning.
Scenario 1: minor repair / top-up (no vacuum)
- The nose of the car must be raised (jack or ramp) — air goes up and out.
- Run the air bleed procedure (Coolant Air Purge) via Service Mode.
- Watch the temperature — stop at 80°C, let it cool, repeat.
- Several bleeding cycles may be required.
- Don't forget to top up coolant after the procedure.
Scenario 2: after HV battery removal — vacuum refill only
The procedure per the Tesla manual:
- In Service Mode start the Coolant Fill/Drain mode (in Toolbox — procedure
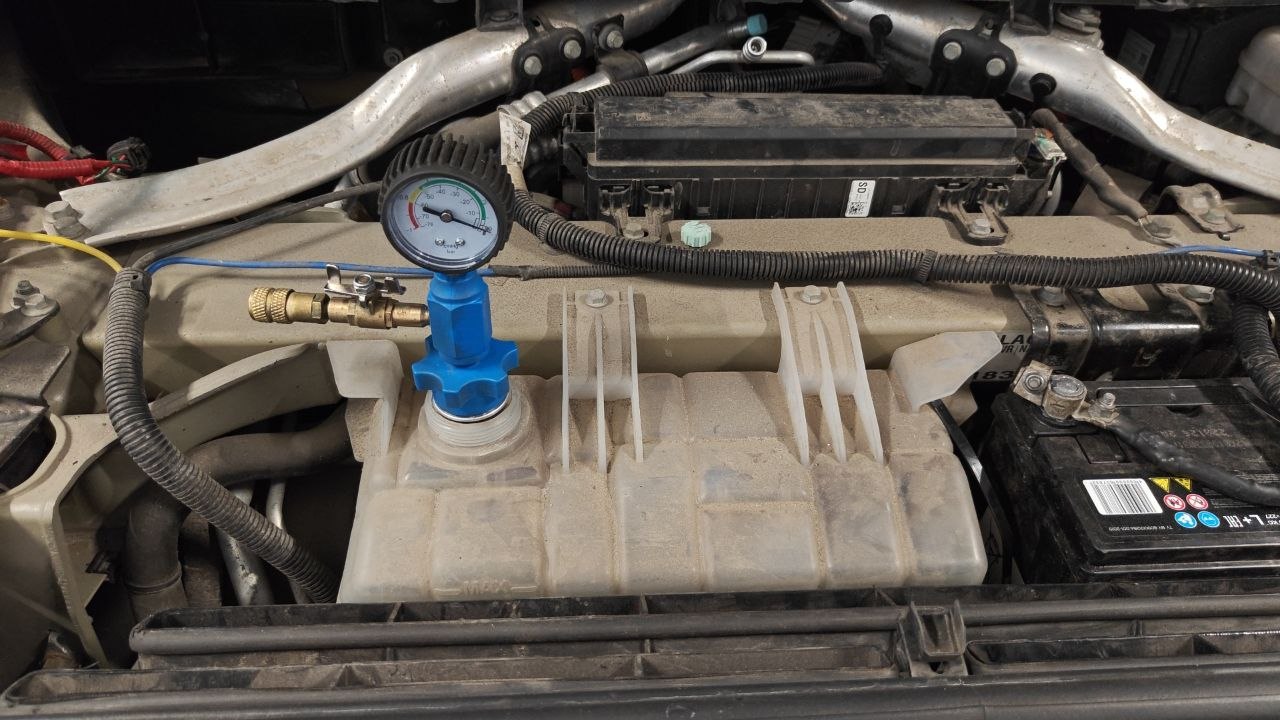
PROC_VCFRONT_X_THERMAL-FILL-DRAIN). The drive rails must be off — otherwise the procedure will stop. - Remove the coolant reservoir cap and fill the system: on cars with a heat pump — to the MAX line, on cars without a heat pump (superbottle) — roughly 6 mm above MAX.
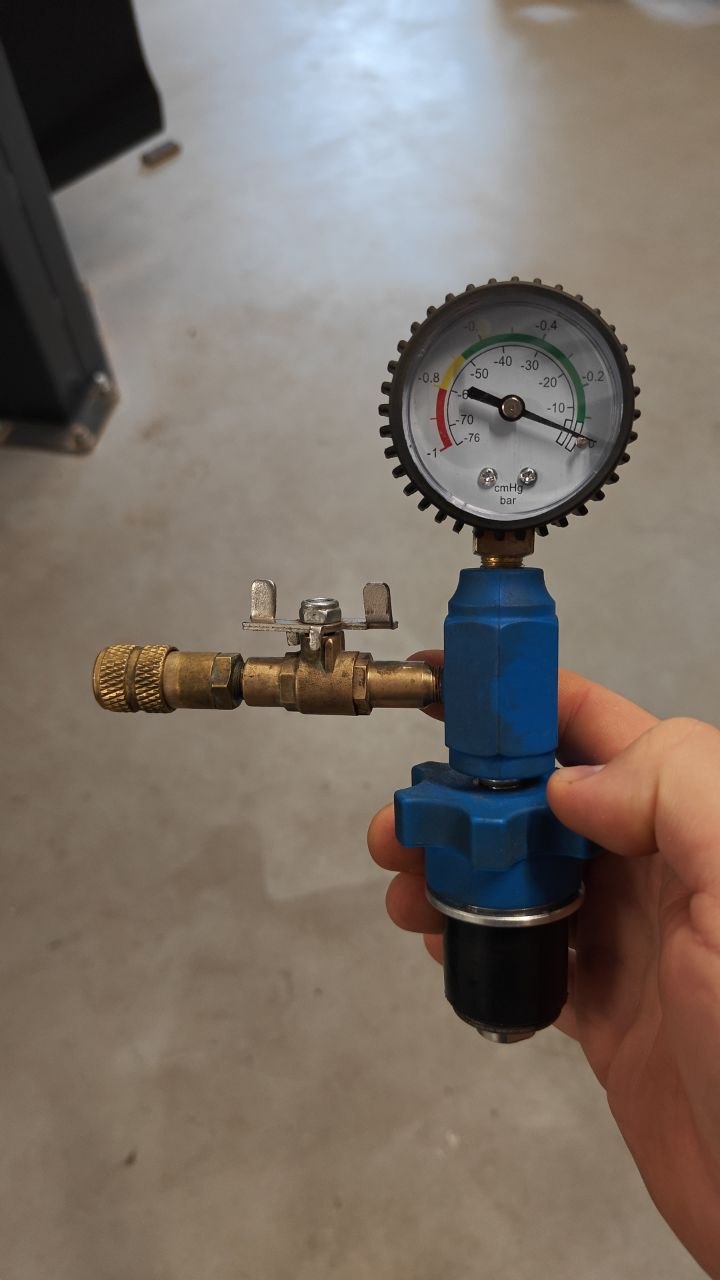
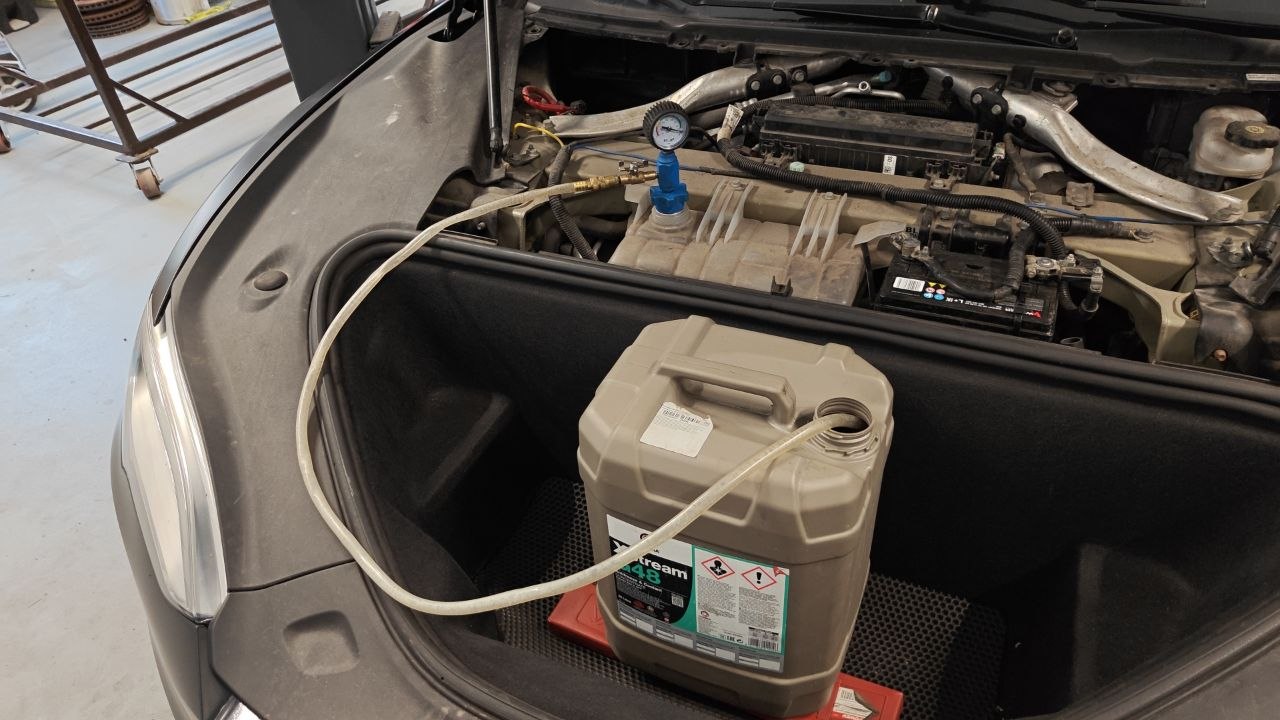
- Create a vacuum with the vacuum rig on the bottle — it is the vacuum that pulls the coolant into the empty loops and leaves no air pockets.
- Run Coolant Air Purge: in Service Mode — Thermal → Coolant System → Coolant Purge Start (in Service Mode Plus — via Drive Unit / Drive Inverter Replacement → Coolant Air Purge; in Toolbox —
TEST_VCFRONT_X_THERMAL-COOLANT-AIR-PURGE). - The procedure runs for about 10 minutes, the pumps vary their speed between 3,500–6,500 RPM (visible on the PT Thermal tab). While it is running — keep the level between NOM and MAX, topping up as the fluid moves into the loops.
- If the speed hovers around 7,000 RPM — air remains, so repeat the procedure.
- After it finishes, top up to the norm: with a heat pump — to MAX, without one — ~6 mm above MAX. Close the reservoir cap.
Community experience TESLA Belarus
From the TESLA owner's group BELARUS chat — analysis of 400 000 messages.
Who reported the issue: Ruslan
Who found the fix: Pasha n1claus, Denis
Discussion in Telegram: #129269
When bleeding is most often needed
Coolant bleeding with air removal is usually required after any work where the system was opened:
- Replacing the heat pump or its components (octovalve, supermanifold) — on Model Y the heat pump with the octovalve has been fitted since launch (2020), on Model 3 — since the 2021 model-year refresh (2021 heat pump issues).
- Replacing the A/C compressor or refrigerant lines (Model 3/Y AC compressor failure).
- Cleaning / replacing the radiator and A/C condenser — coolant usually spills during disassembly (radiator and condenser cleaning).
- Replacing the drive unit, especially the LDU (Large Drive Unit) — it shares the cooling loop with the battery (LDU problems S/X).
- Any HV-battery work where the pack coolant was drained — here vacuum refill ONLY (scenario 2).
In all these cases a standard refill via Service Mode will hit the airlock unless the procedure above is performed.
Links
- Cooling System Refill and Bleed — Tesla Service Manual: https://service.tesla.com/docs/ModelS/ServiceManual/Palladium/en-us/GUID-A474F6DC-B48D-4184-8B5F-A4A4FB8ED1FA.html
- Cooling System Bleed — Model 3 Service Manual: https://service.tesla.com/docs/Model3/ServiceManual/2024/en-us/GUID-16455A85-902B-4E9A-84FE-F6EF7BC0D0FB.html
Related
Full list →Tesla battery errors (BMS): Service Mode codes decoded, what they mean & repair cost (2026)
Full breakdown of the scary Tesla battery codes from Service Mode: BMS_a066/a064/a079 (imbalance), BMS_f107 (sense tabs), BMS_a035/a037 (moisture), BMS_f038 (contactor). What each error means, who it affects (model/year/chemistry) and what the repair costs in Belarus — with links to detailed articles.
Model 3/Y 82 kWh Panasonic (US): frequent module imbalance
American 2021–2022 LR cars show frequent imbalances; the root cause is current leaks through the fuse-wire "fingers" of the 21700 cells. Thresholds (up to 8 mV is fine, alert at >150 mV), a breakdown of the BMS_a029/a064/a074/a079 codes from Toolbox, photos of leaking modules and every treatment option — from module repair (tsk.by's recommendation) to a swap to LG 79.
Tesla Model 3/Y no heat in winter: 2021 heat-pump problems, PT-sensor recall, fixes (2026)
Why early 2021 Model 3 and Model Y refresh cars lose heat in heavy frost: PT-temperature-sensor failures in the heat pump, octovalve / supermanifold mechanical issues, the Tesla service-bulletin replacement of three PT-sensors, and what the firmware updates closing 'stuck' valve positions actually do. Symptoms, repair scope, typical cost.